


Extra Flaky Pie Crust Recipe
rough puff pastry meets pie dough–the only way I'll do it from now on

I’ve never been a huge fan of pies, but over the years I’ve realized it’s because I don’t love pie crust. That changed when I filmed a plant-based pecan pie video with Susannah Schoolman, founder of plant-based butter brand Tourlami. I’ve had flaky-ish pie crusts before, but she used a method of semi-laminating the dough–similar to how you’d make a rough puff pastry–which resulted in the flakiest, almost caramelized crust I’ve ever had.
When I was working on a crust recipe for the Raspberry & Cream Pie, I knew that because the filling and jam were so simple, I wanted the crust to be the showstopper of the recipe. I thought back to baking with Susannah and realized the rough puff method was exactly what this crust needed.


Like any rough puff pastry, the goal is to fold in evenly sized pieces of butter. And like any pie crust, the key is to keep the butter from softening–which is why it’s so important to chill it thoroughly between steps.
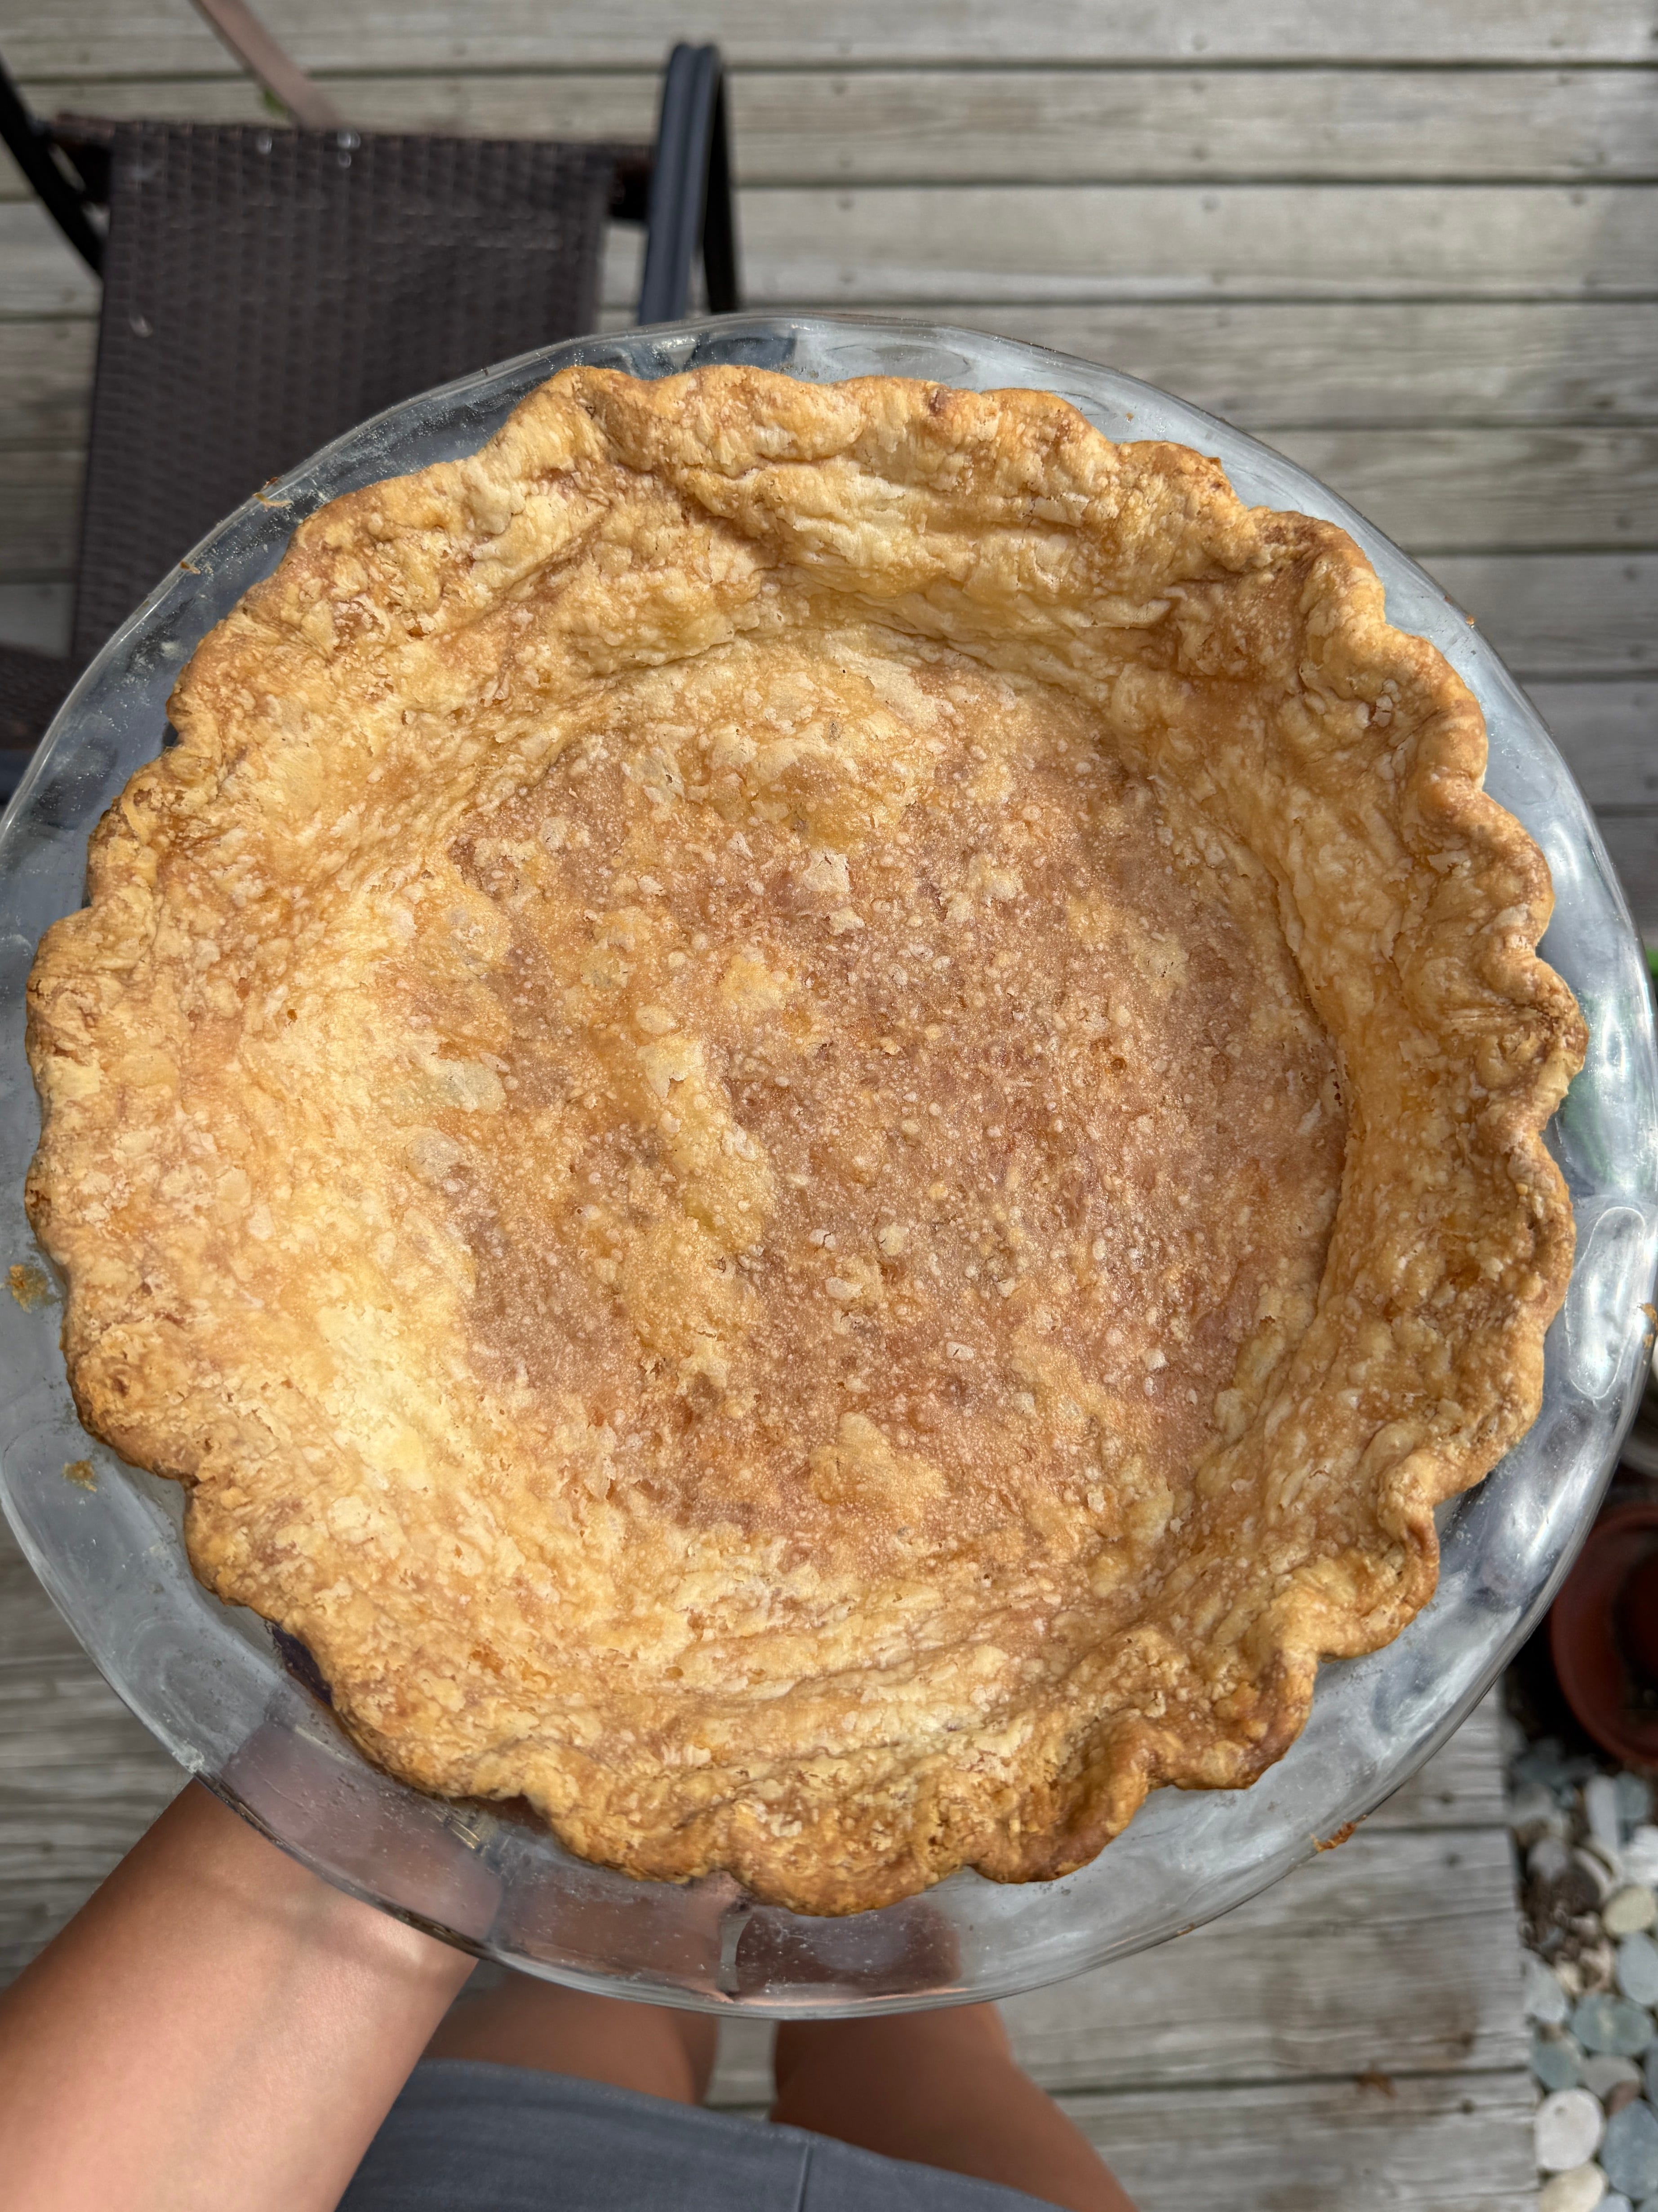
The crust is solidly frozen before baking, which helps it hold its shape a bit–but don’t be put off if some of the scalloped edges disappear. Because there are so many visible butter pieces, this is bound to happen. Also, trust the process! It might not look stunning right out of the oven, but I promise, as long as you follow the exact steps, don’t press in any of the butter, keep it cold, and let it get deeply golden in the oven, it will turn out incredibly flaky.
Ingredients
1 3/4 cup plus 2 tablespoons (225 grams) all-purpose flour
~12 tablespoons unsalted butter (170 grams), very cold
3/4 teaspoon Diamond crystal kosher salt
1/2 cup plus 2 tablespoons (142 grams) ice water
Directions
Combine the flour and salt in a medium bowl.
Grate the cold butter using the large holes of a box grater. Add the grated butter to the flour and gently toss until all the pieces are coated. Don’t mash or press the butter into the flour–just break up any large clumps so the butter stays in distinct pieces.
Drizzle in 1/2 cup of cold water, then use your hands to scoop and gently toss the mixture until you have a very shaggy dough and all of the flour is hydrated. If the dough still feels dry, add the remaining 2 tablespoons of water, one at a time (you’ll likely need both). Avoid kneading–just press the dough into a rough ball, then flatten into a 1-inch-thick disk. Wrap in parchment or plastic and freeze until mostly firm, about 15 to 20 minutes.
Unwrap the disk and divide it into four equal parts. Stack the four quarters on top of each other, then use floured hands to press the stack back down into a 1-inch-thick disk. The edges will look rough—that’s okay. Wrap and chill the dough again until firm, another 15 to 20 minutes.
Flour a work surface, then roll the dough out into a rough 8-inch round, flipping and re-flouring as needed. Use a knife to trim any uneven edges and pat the scraps back into the dough–this helps create a cleaner circle, meaning you’ll have less excess to trim later and end up with a thicker, more even crust. Roll the dough out again into a 12-inch round.
Lightly flour the dough surface, then roll it up over your rolling pin and drape it into a 9-inch ceramic pie dish. Trim any excess dough hanging over the sides, then gently fold the edges under to build some height. Use your pointer and middle finger to press and crimp the edges against the rim of the pie plate to create a scalloped pattern. Prick the bottom of the crust all over with a fork. Freeze until completely solid, about 30 minutes.
Preheat the oven to 425ºF/218ºC with a rack in the center position. Line the frozen crust with parchment paper and fill it with pie weights (or dried beans, rice, or sugar). Bake until the edges begin to turn light golden, about 25 minutes. Remove the parchment and weights, then continue baking until the bottom and sides are a deep golden brown, 10 to 15 minutes more. Let the crust cool completely before using.